Remote system connection
1 Introduction
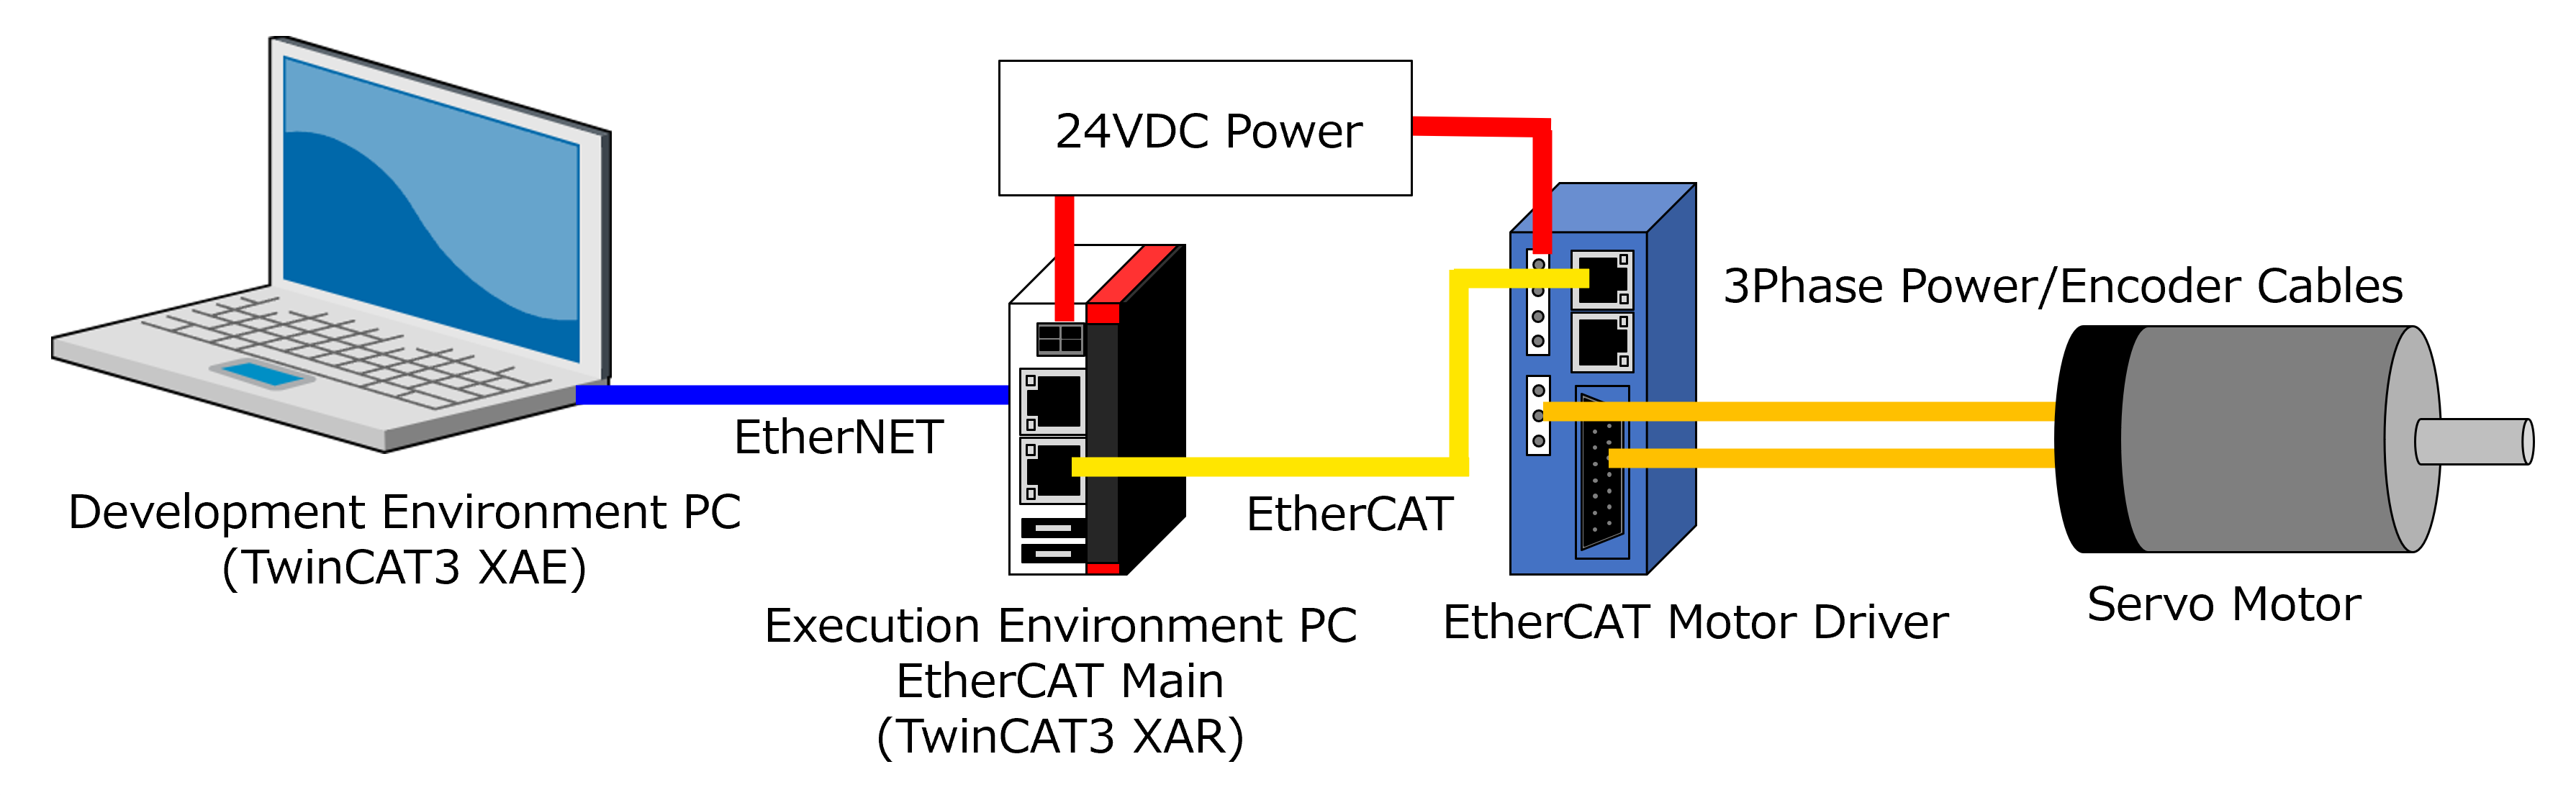
In TwinCAT development, while you can install both the development environment (XAE) and Runtime (XAR) on a single machine, it is often more efficient to separate them. Using a Remote System Connection allows you to develop on your primary laptop while the code executes on a dedicated target PC.
2 IP Adress Setting
When using an office PC as a development environment, you may encounter connectivity issues unless a Static IP Address is configured. In many corporate networks, Dynamic IP addresses (assigned by DHCP) can change over time, causing SSH connections, database links, or local servers to break. To ensure a stable connection, follow these steps to manually assign a static IP address to your machine.
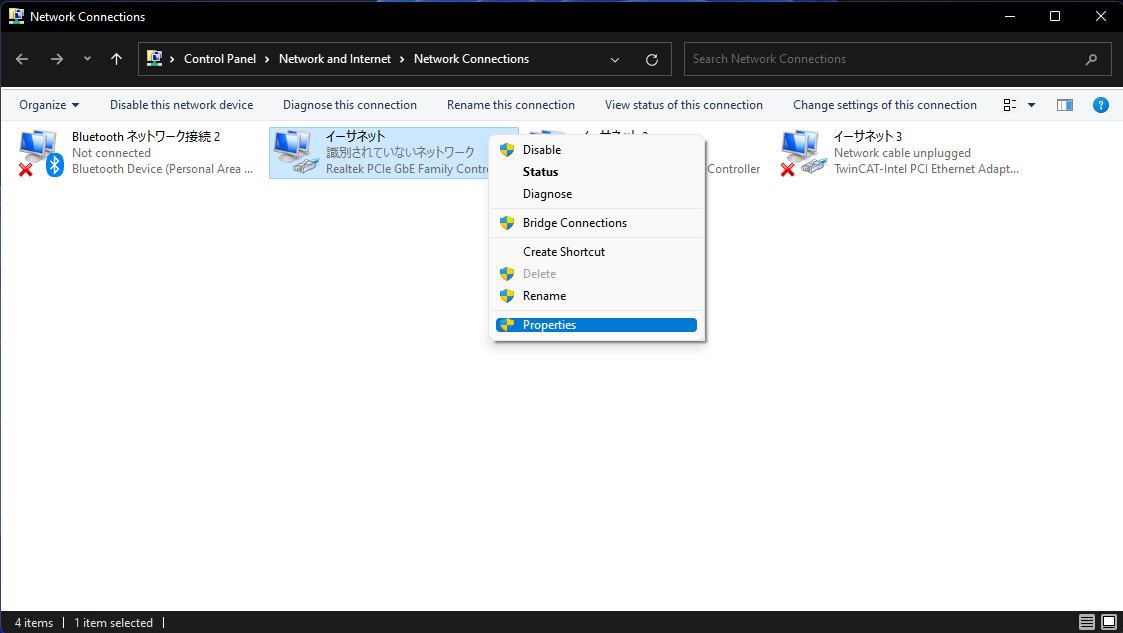
Open “Network Connections”, then set appropriate IP addresses on each PC.
How to Open Network Connections
- Open Settings from Windows Start.
- Click “Network & internet.”
- Click “Advanced network settings.”
- Click “More network adapter options.”
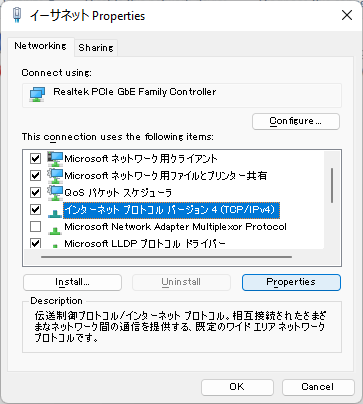
2.1 Execution Environment PC Side Setting
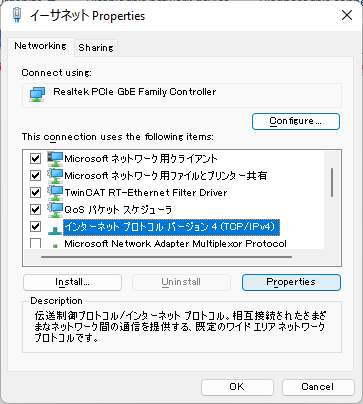
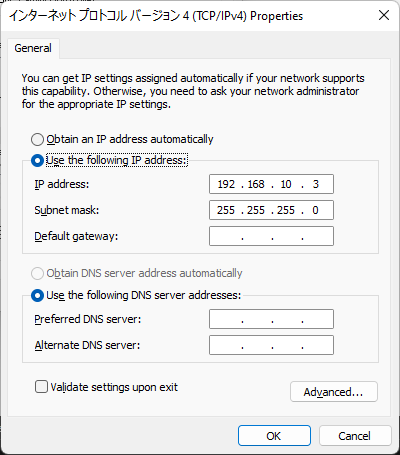
Open TCP/IPv4 properties of Ethernet to connect to the development environment PC, then set the following IP address and subnet mask.
- IP adress: 192.168.10.3
- Subnet mask: 255.255.255.0
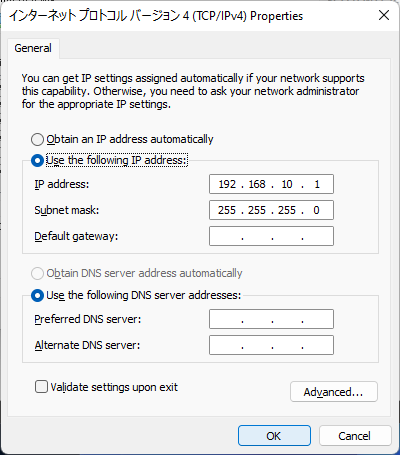
2.2 Development Environment PC Side Setting
Open TCP/IPv4 properties of Ethernet to connect to the execution environment PC, then set the following IP address and subnet mask.
- IP adress: 192.168.10.1
- Subnet mask: 255.255.255.0
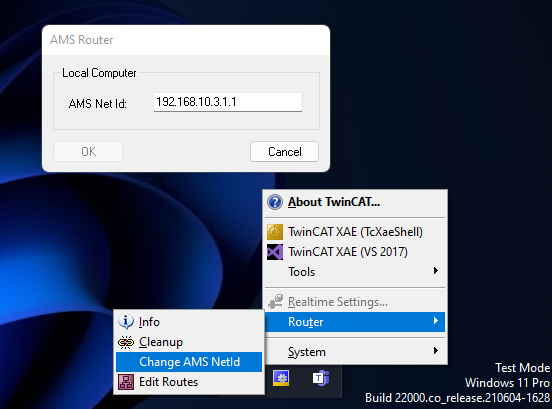
3 AMS Net ID Setting
In the execution environment PC, set the following AMS Net Id. Here, check and set a different AMS Net Id to the development environment PC.
4 Specific Ports Opening
Open Windows Defender Firewall with Advanced Security.
Windows Security -> Firewall & network protection -> Advanced setting
Set the following Inbound Rules and Out Bound Rules in the both PCs.
| Protocol | Port No. | Direction | Usage |
|---|---|---|---|
| TCP | 48898 | Inbound & Outbount | Communication |
| UDP | 48899 | Inbound & Outbount | Broadcast search |
| TCP | 8016 | Inbound & Outbount | Secure ADS |


5 Remote System Connection
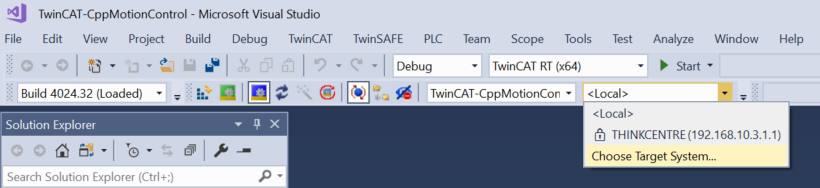
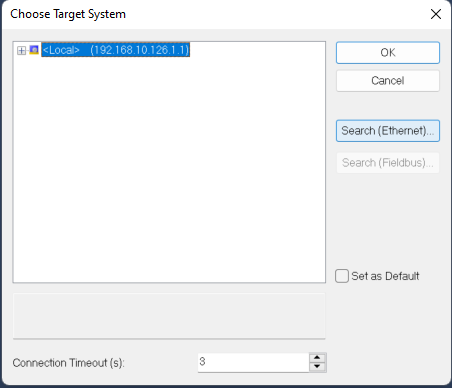
Select and click “Choose Target System” in the tab.
Click “Search (Ethernet).”
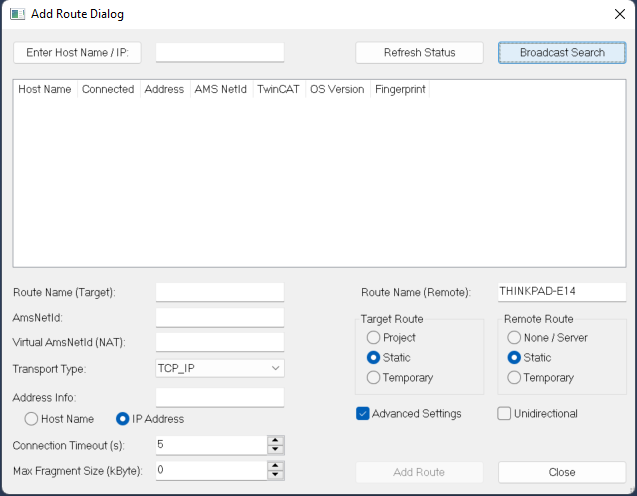
Check “Advanced Setting.”
Check “IP Address.”
Click “Broadcast Search.”
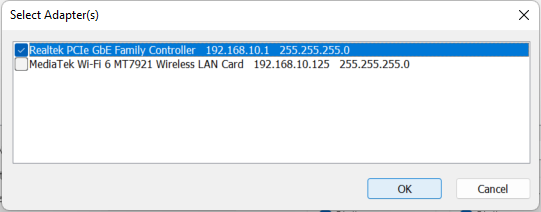
Select an adapter to connect to the execution environment PC, and push “OK.”
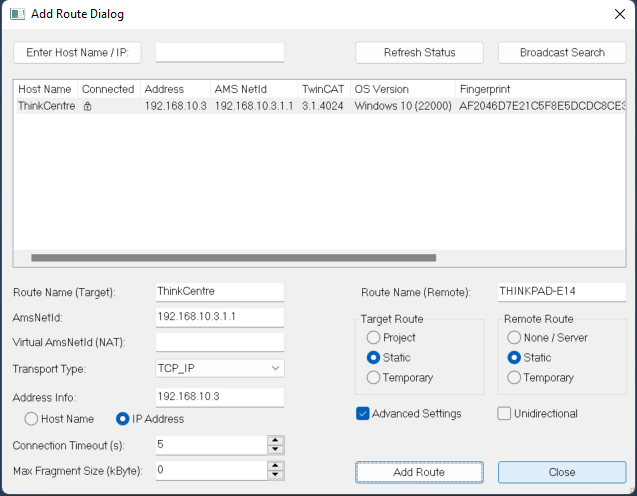
Click Add Route.
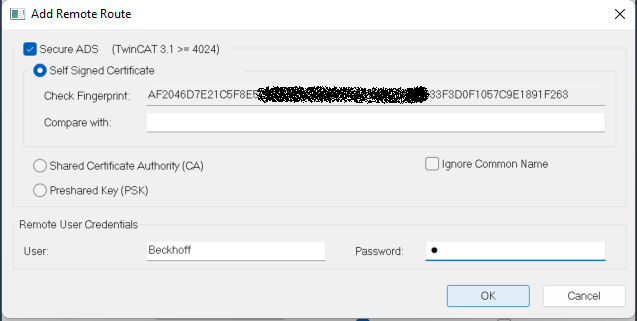
Check “Secure ADS”, write an administrator local account info. of the execution environment PC, then push “OK.”
See the execution environment PC’s name in “Host Name” and the key icon in “Connected.”
Close the popup window.
The following figure shows a successful statement of the remote system connection.
