Conversion of commercial PCs to IPCs
1 Introduction
IPCs (Industrial PCs) which operate in real-time as an EtherCAT Master is well known from Beckhoff, but its delivery time has been considerably extended due to the current situation.
Therefore, I would like to describe the procedure for converting a commercial PC to IPC so that IPC can be used easily for research and development until it is installed in a product, or for non-commercial personal development.
This is a mini PC ThinkCentre M75q Tiny Gen2 with a good reputation for worth buying.
Specifications
- OS: Windows 11 Pro 64bit
- GPU: AMD Ryzen™ 5 PRO 5650GE
- Memory: 8 GB DDR4-3200MHz
- Storage: 256 GB SSD, M.2 PCIe-NVMe
After purchase, a 16 GB memory has been added to empty slots and the storage has been replaced with 1 TB, but can be left as is. For those who are comfortable placing even a large PC, a tower PC with PCI-Express slots is easier.
2 Installation of Software
2.1 Installation of Visual Studio
Install Visual Studio Community 2017 for personal use or Visual Studio Professional 2017 for commercial use. See Link for instructions.
Enable the check boxes for the following items in Visual Studio Installer, then install them.
Workload - NET desktop development - Desktop development with C++
Language packs - English
2.2 Installation of TwinCAT3
3 NICs (Network Interface Cards) supported by TwinCAT
3.1 Preparation of NIC
Open the files TcI8254x.inf and TcI8255x.inf in [C:\3.1] with a text editor to see the list of NICs supported by TwinCAT3. Link
Purchase a NIC with an Intel network chip in the lists and attach it in your PC. This is the NIC I purchased, which is equipped with Intel 82573L chip.

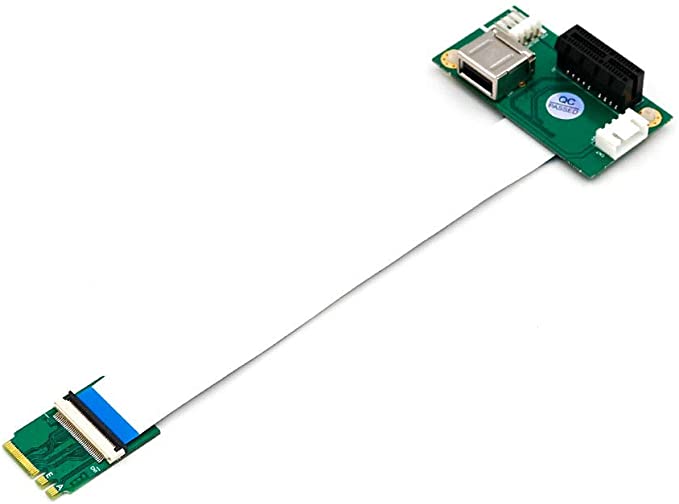
The interface of NICs is basically PCI-Express and this PC used does not have a compatible slot. So, it cannot be attached as it is.Therefore, I purchased the adapter to convert M.2 Key A/E to PCI-Express X1 so that it can be attached.
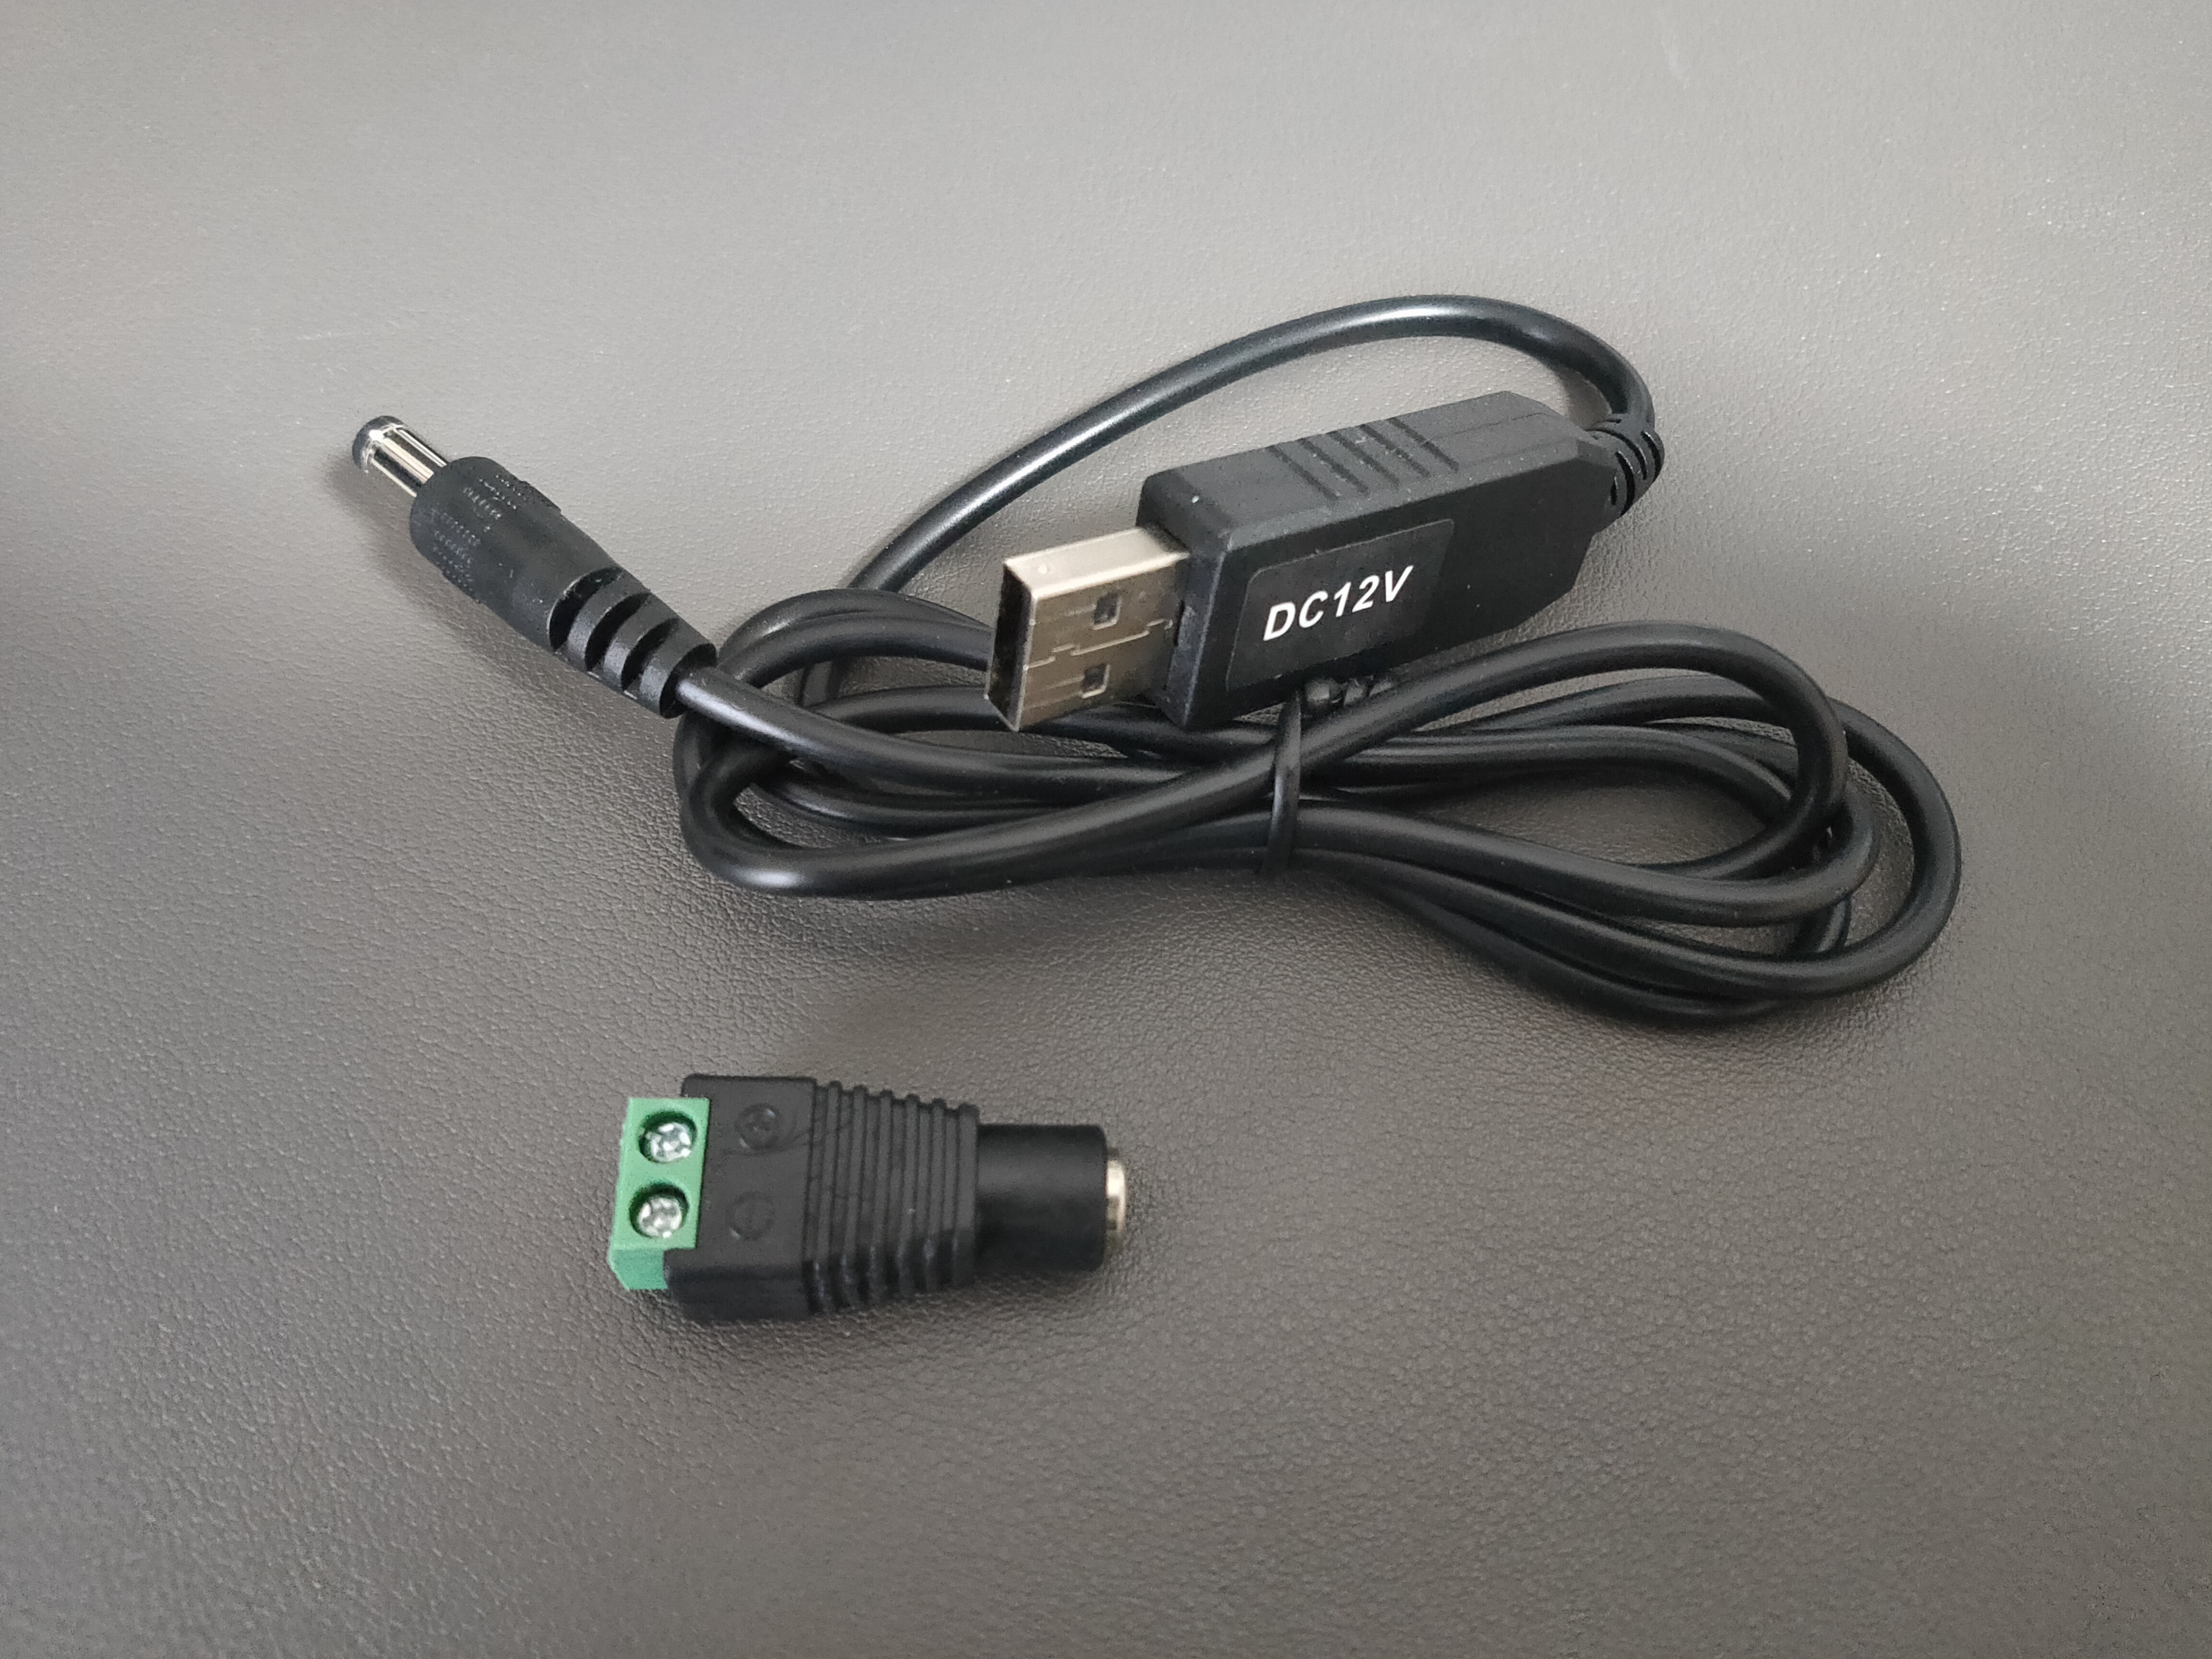
Since a separate 12V power supply is required on the PCI-Express side, I also purchased a voltage booster that boosts 5V from the USB Port to 12V and a 5.5mmx2.1mm DC jack connector (female) with screw terminals.
3.2 Attachment of NIC
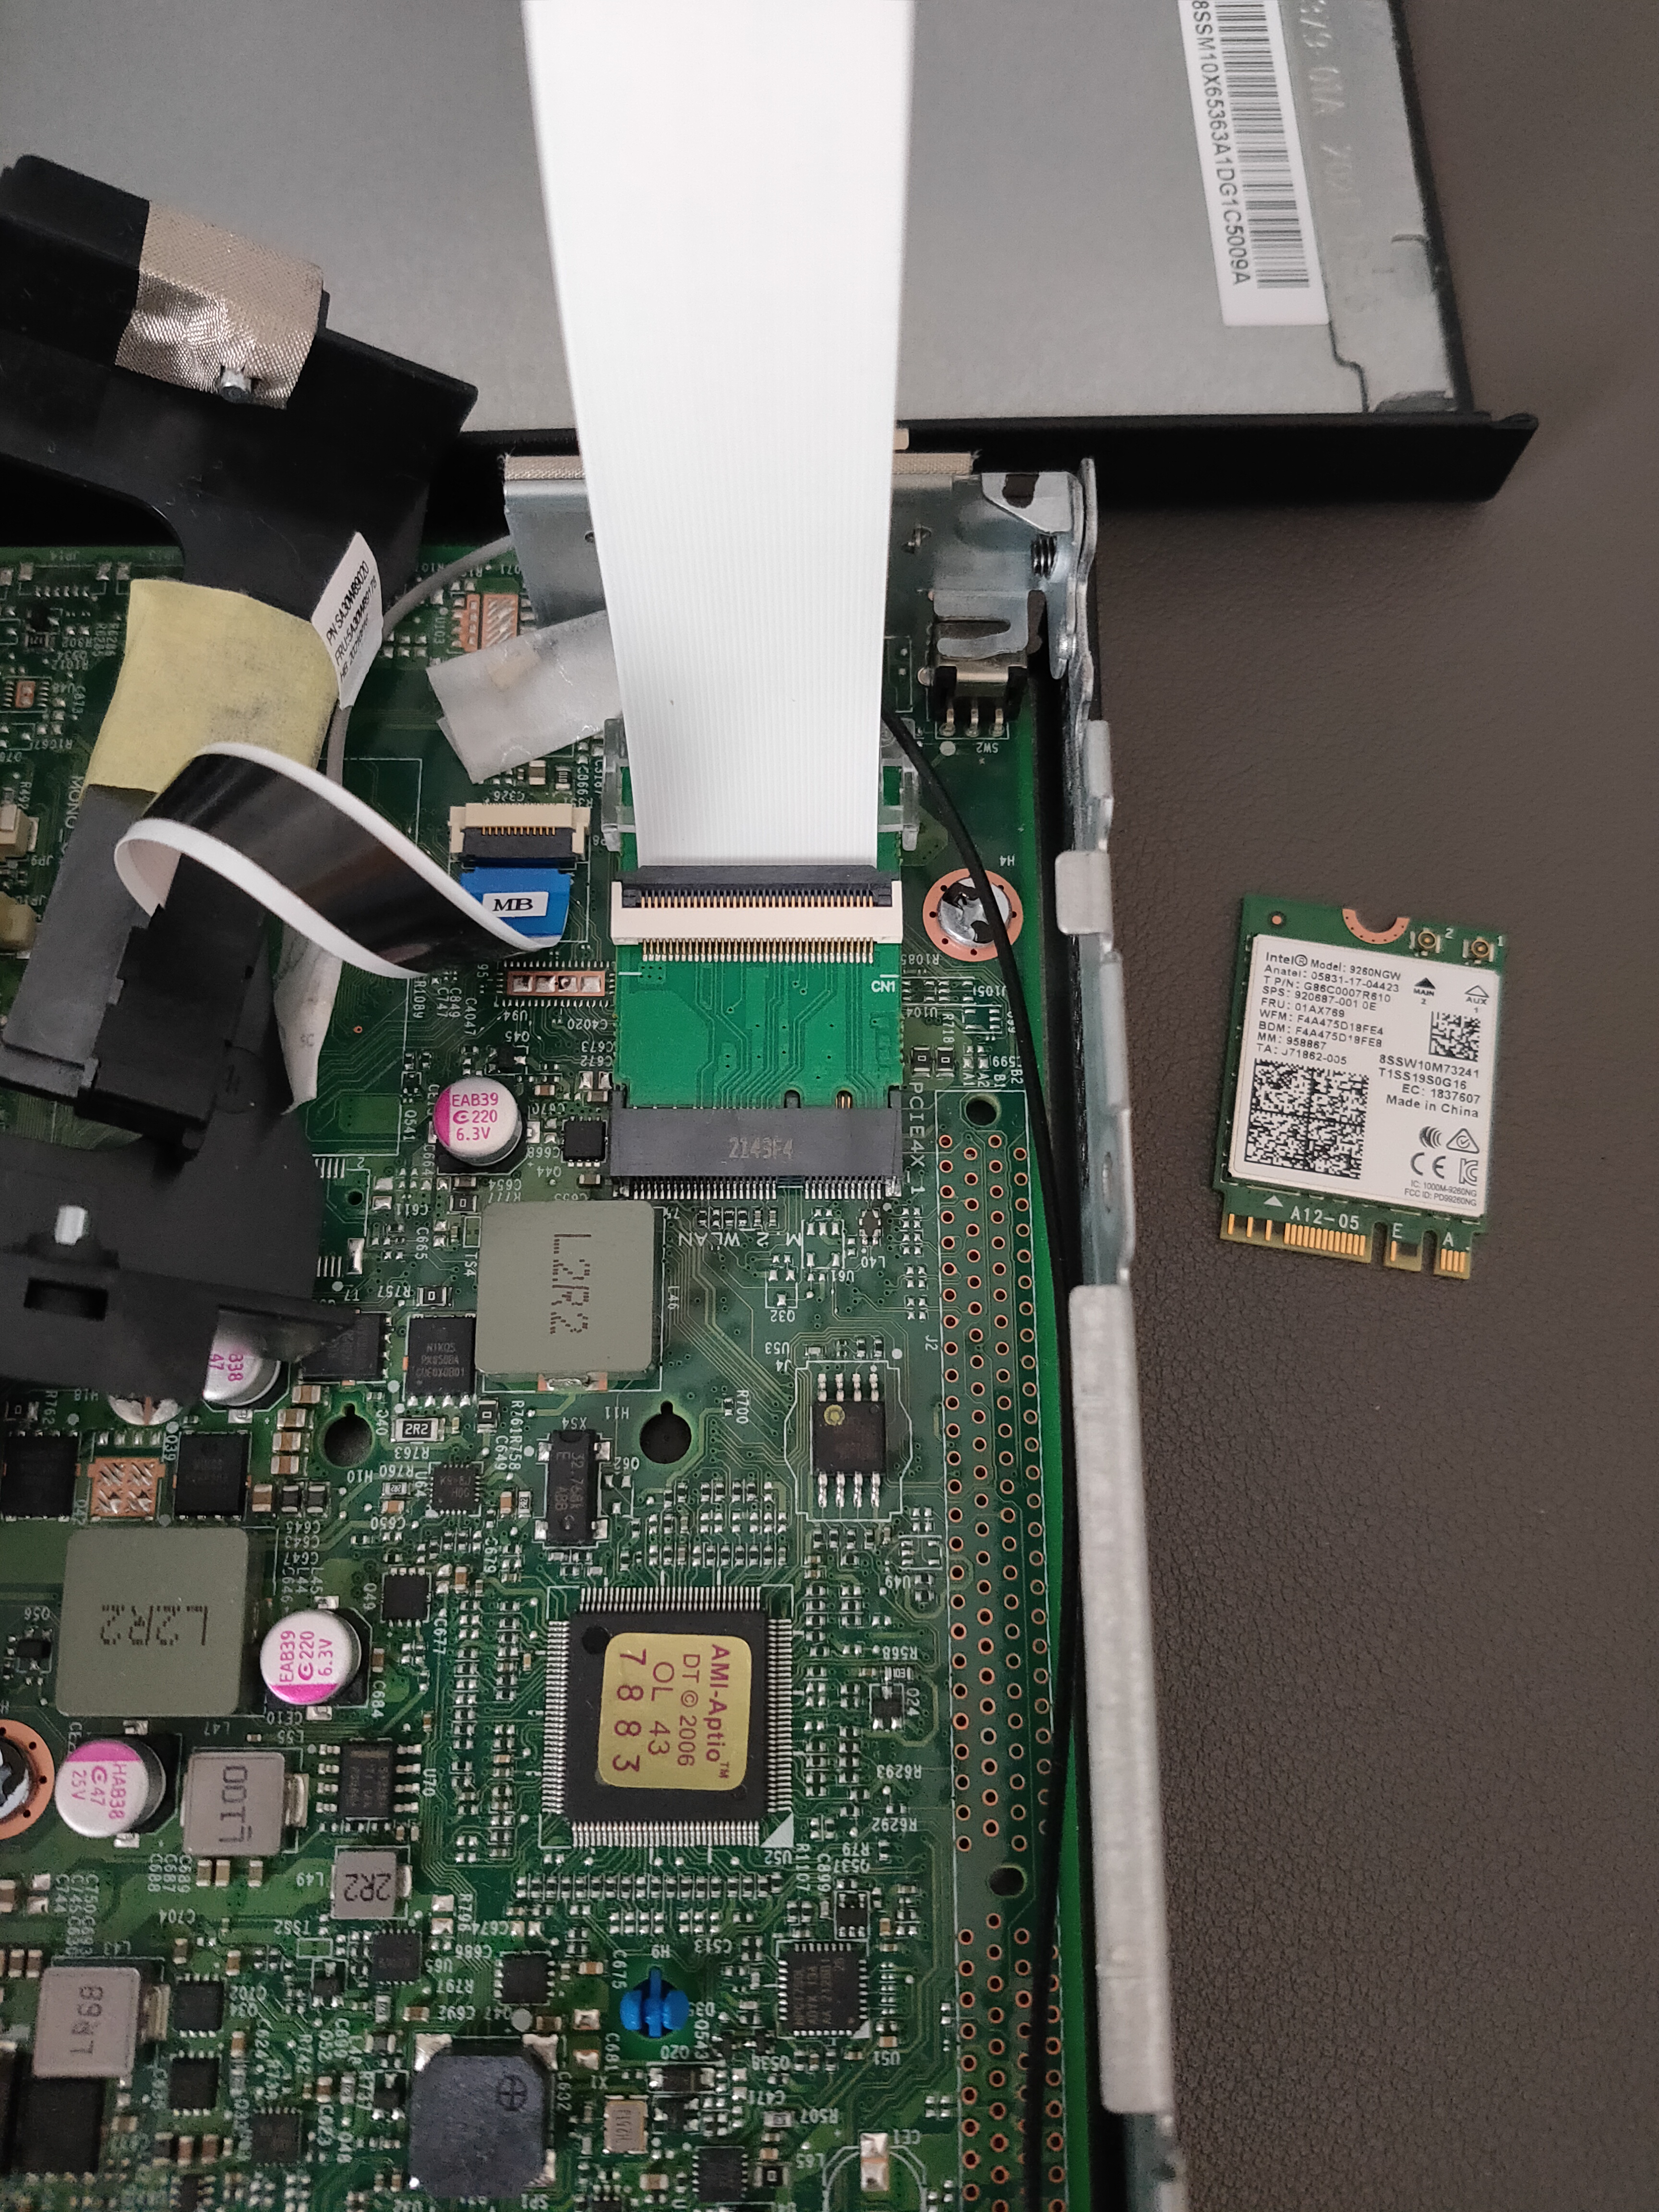
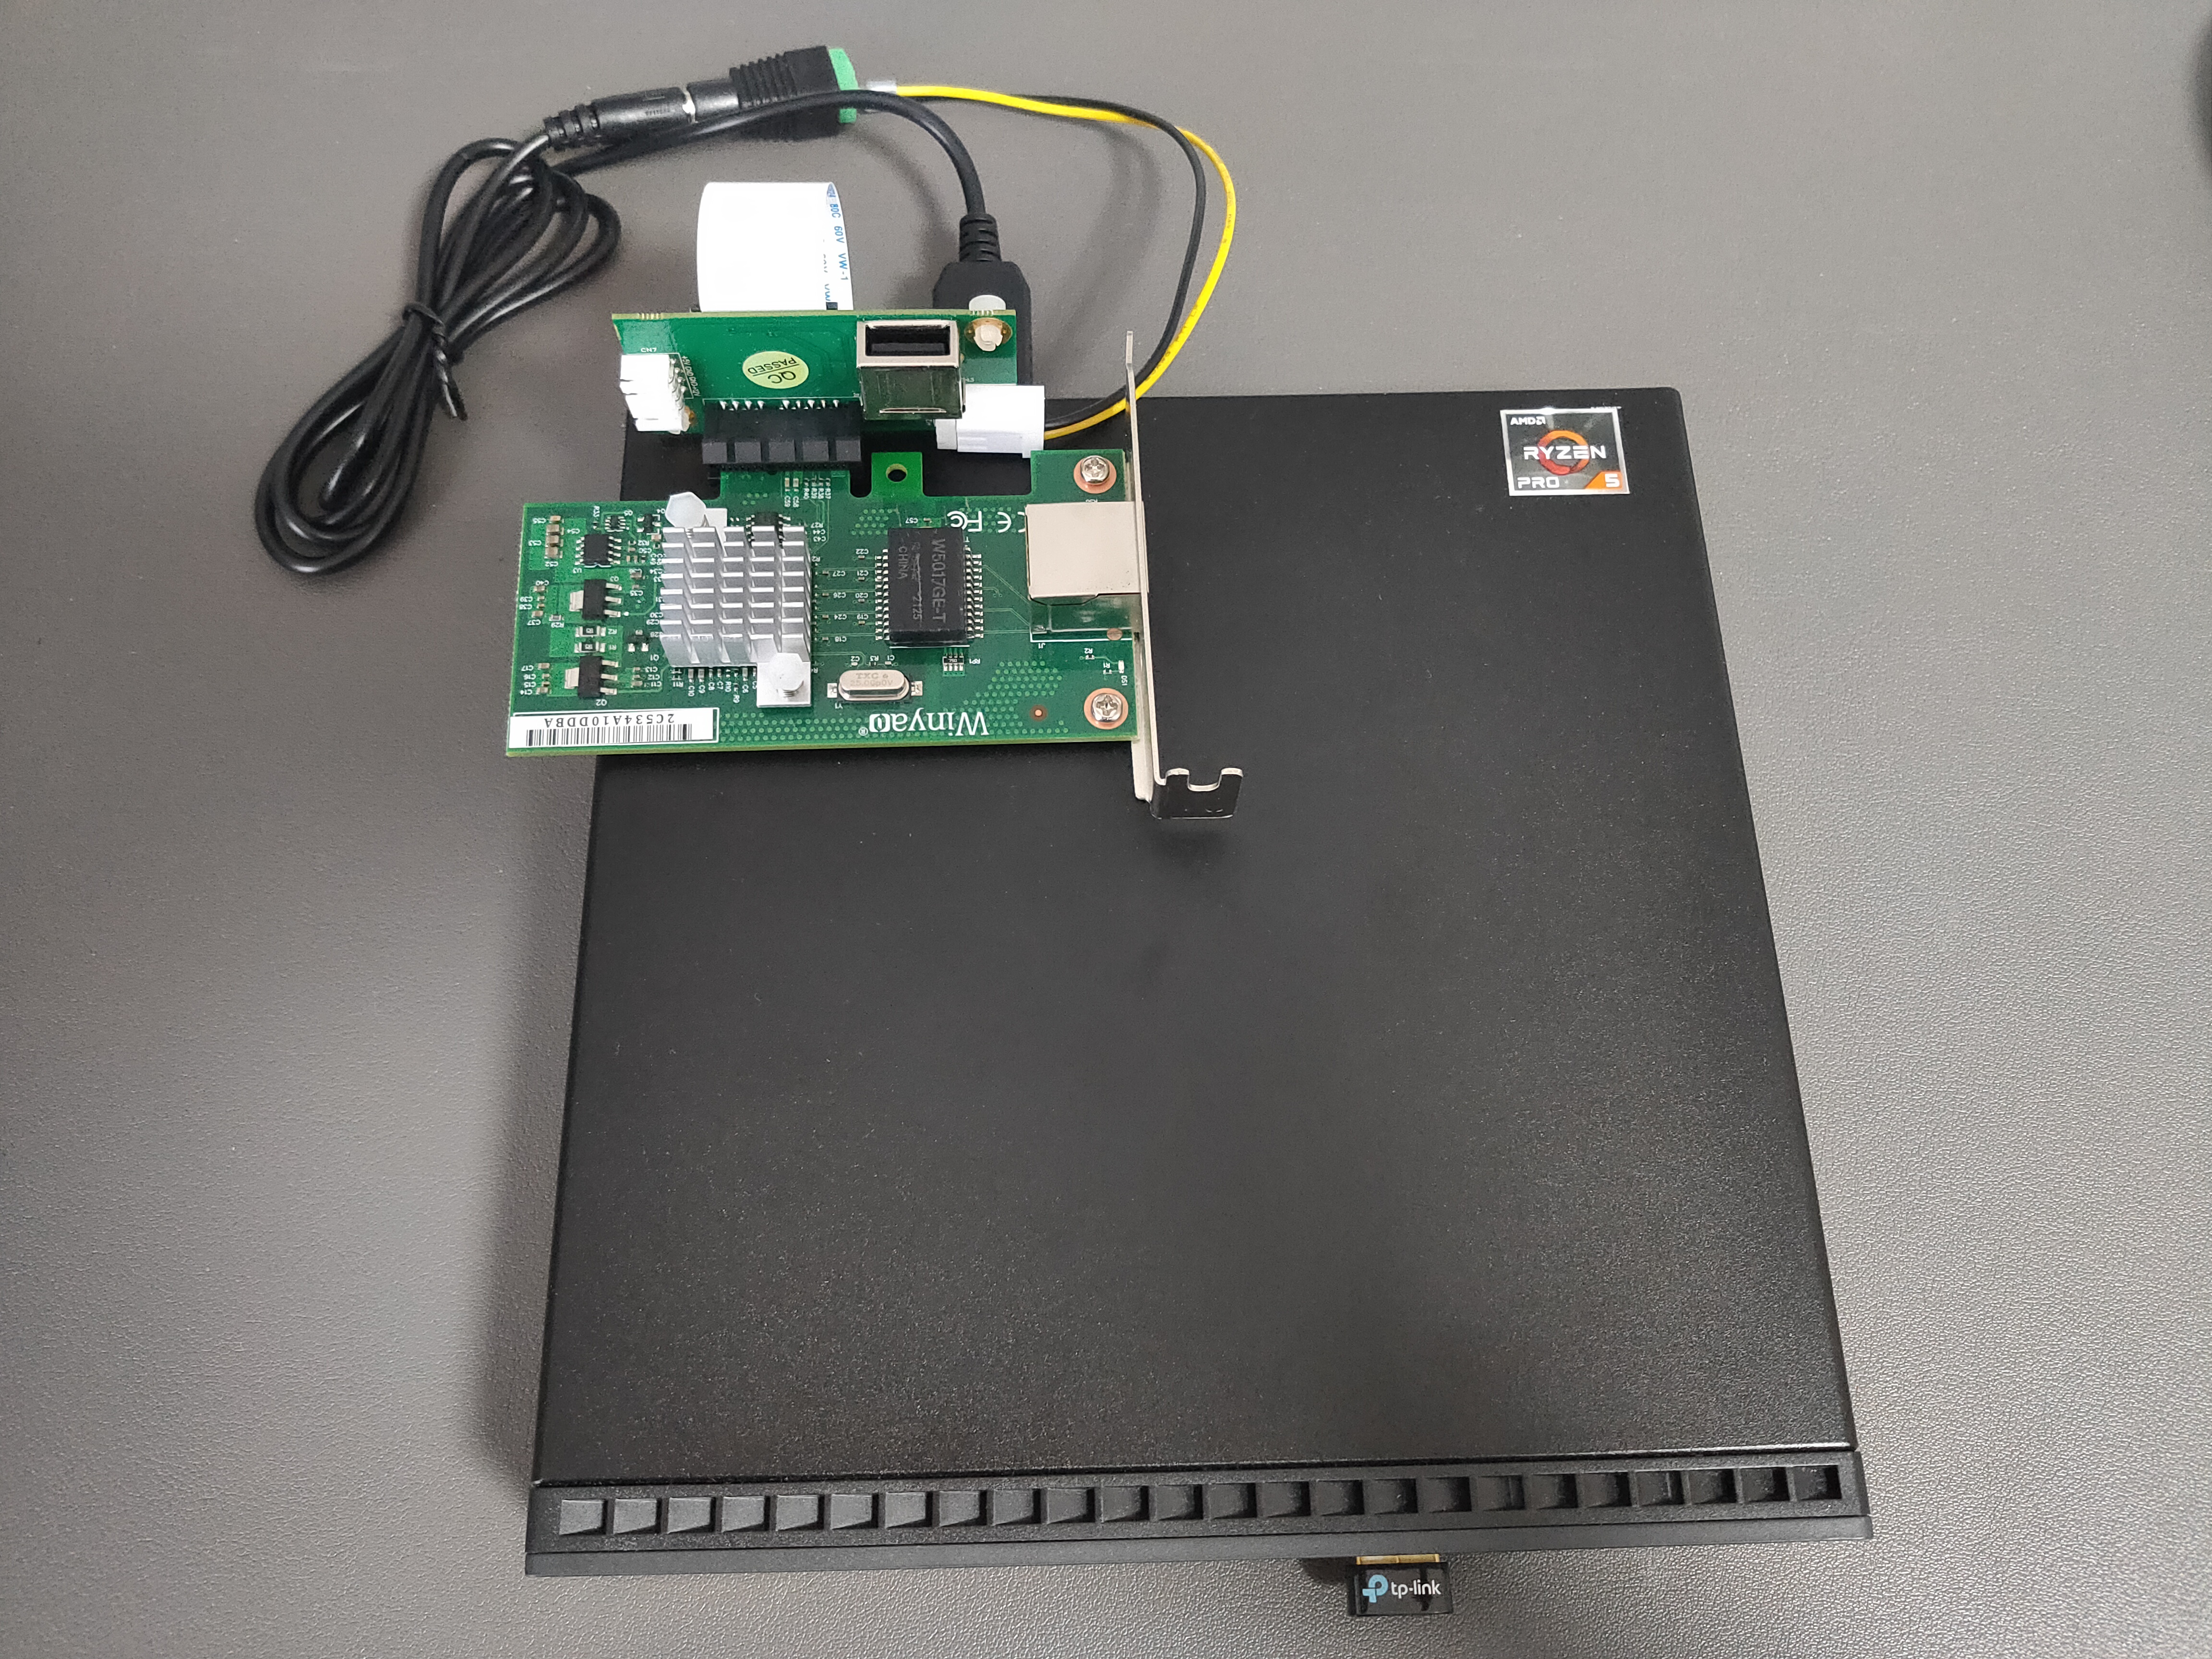
Once everything is in place, it is time to attach. As mentioned above, this mini-PC does not have a PCI-E slot, so open the inside once and remove the Wireless LAN/Bluetooth Card 9260NGW that is stuck in the M.2 Key A/E slot, and attach the conversion adapter.
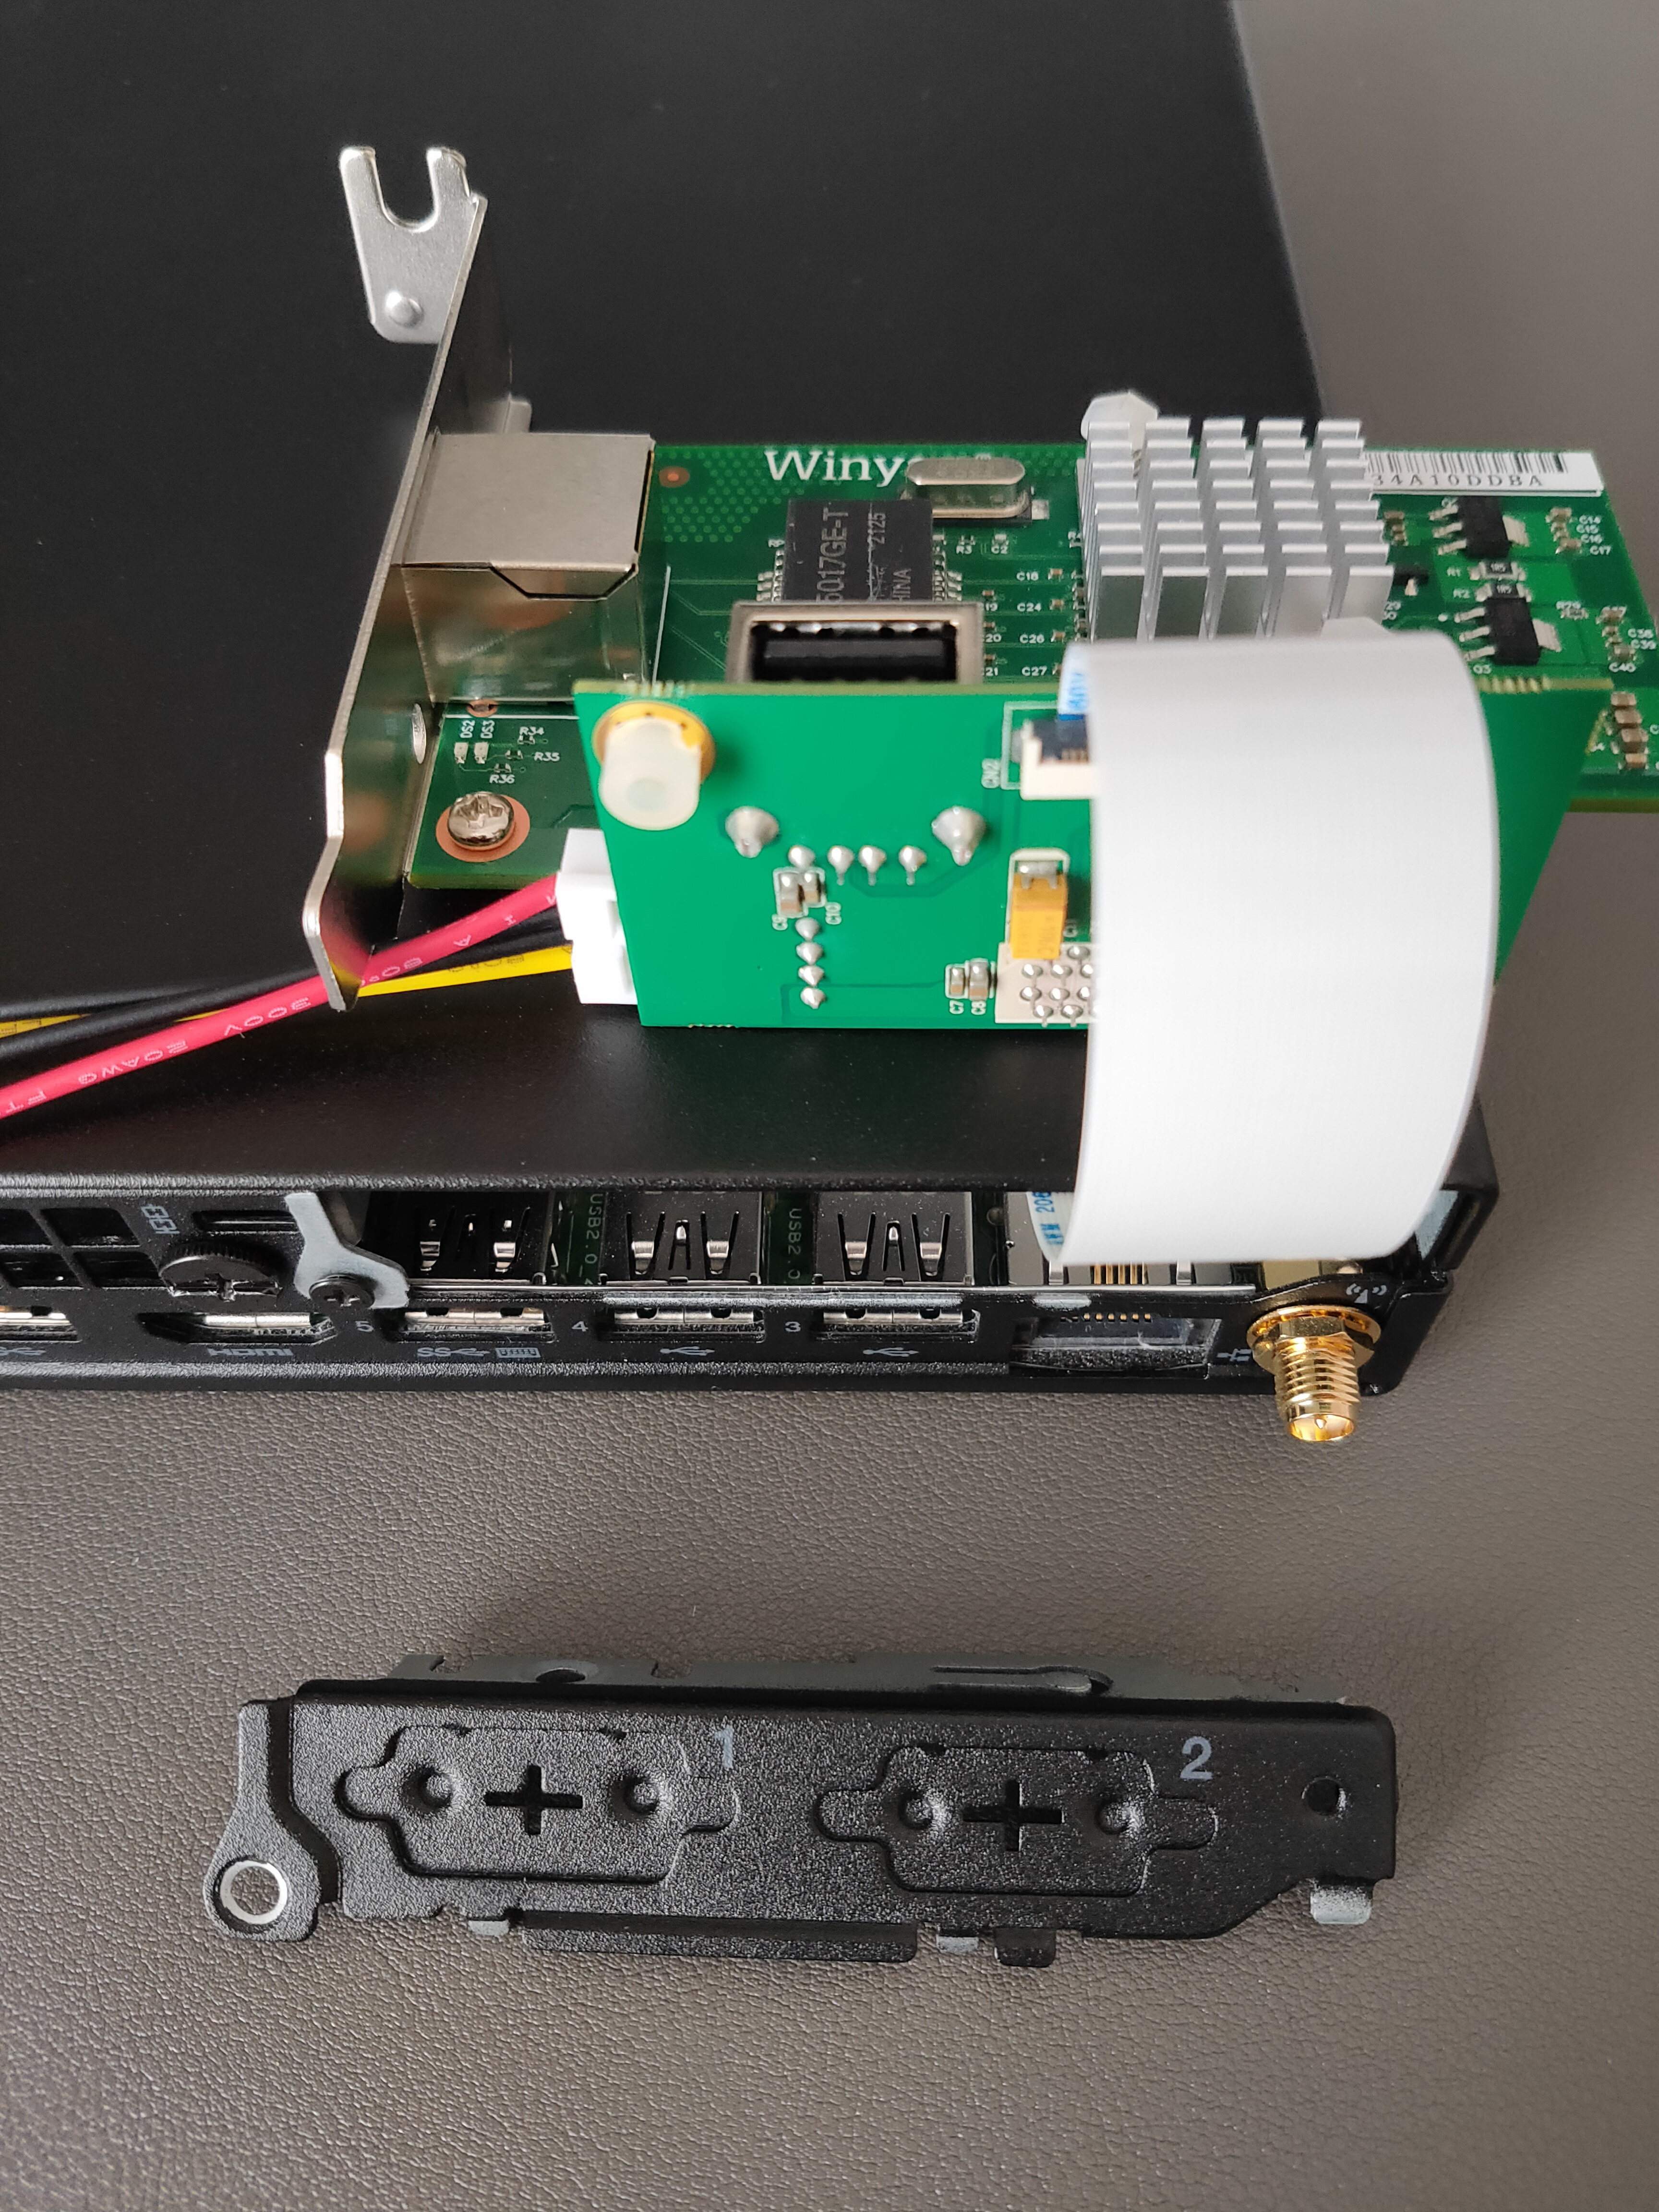
Since the NIC is too large to set inside, it is placed on the top panel of the PC via a flexible cable as shown in the following figure. Then, connect the boosted 12V from the USB slot to the corresponding terminal on the PCI-E side and you are done.
If you continue to need Wireless LAN or Bluetooth capability, purchase a USB adapter for each. I purchased a USB adapter of Bluetooth because it was necessary.
3.3 Install of TwinCAT Realtime Ethernet Driver
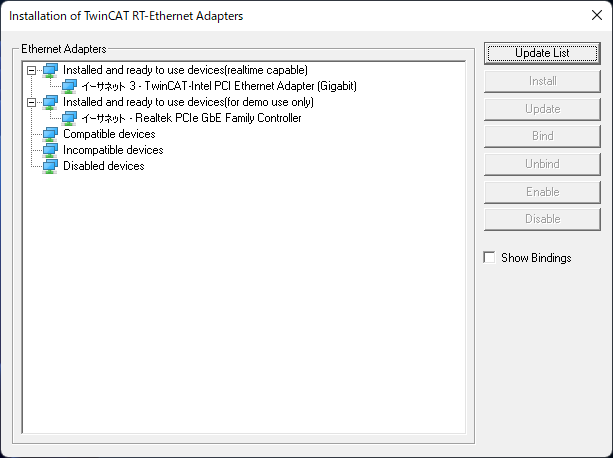
Start Visual Studio and open TwinCAT -> Show Realtime EtherNet Compatible Devices, or open “C:\3.1.exe”. Select the installed Intel NIC from “Compatible devices” and click the “Install” button to install the TwinCAT Driver.
Confirm that the driver was installed on the Intel NIC as “TwinCAT-Intel PCI Ethernet Adapter (Gigabit)” under “Installed and ready to use devices (realtime capable).”
If you try to install the TwinCAT Driver on the Realtek NIC originally installed in the PC, it will move to “Installed and ready to use devices (for demo use only)”. You can also run XAR here, but the operation will be unstable and unusable.
Therefore, to run a commercial PC as a stable EtherCAT Master, a Intel NIC supported by TwinCAT must be required.
3.4 Update1: Hardware Optimization
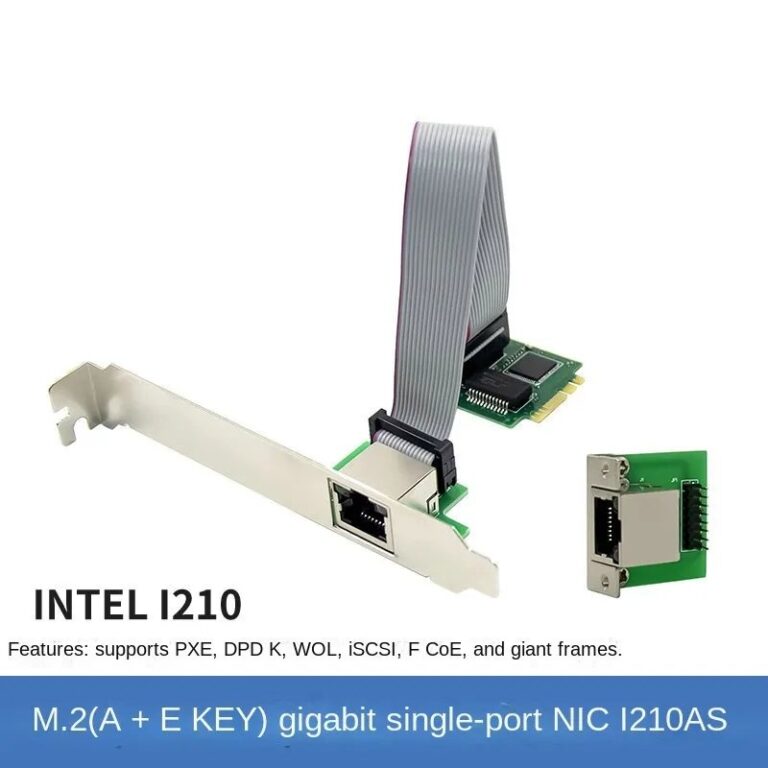
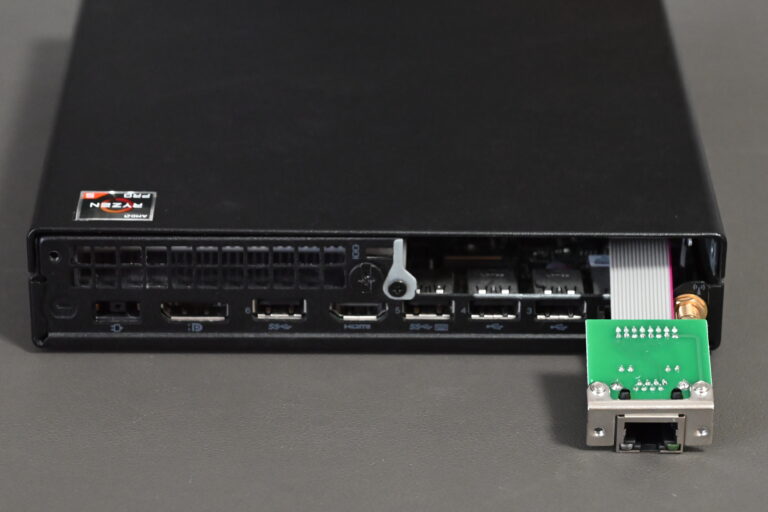
Later, I discovered an Intel I210-based NIC in an M.2 Key A/E form factor on AliExpress.
Using this module significantly simplified the hardware configuration by eliminating the need for external adapters and an additional 12V power supply. The TwinCAT Real-time Ethernet Driver was installed successfully, and the system is working well.
3.5 Update2: Mini-PCs with built-in Intel NICs
Recently, mini-PCs with built-in Intel NICs have become popular because they are affordable and easy to purchase.
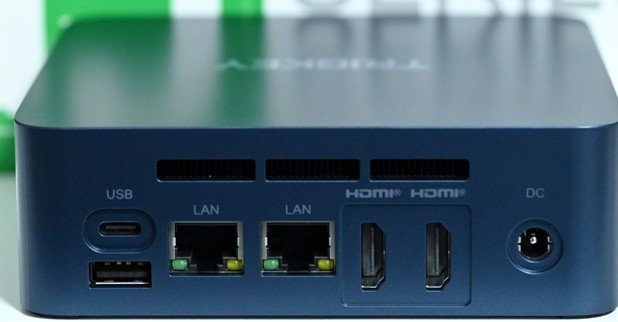
Trigkey G5
[!IMPORTANT] Compatibility Note for TwinCAT Users: While the Intel I225-V has been confirmed to work with the TwinCAT RT-Ethernet manual driver, please be aware that we have encountered issues with the Intel I226-V, where the driver could not be installed successfully. If you are selecting a mini-PC specifically for TwinCAT or EtherCAT development, the I225-V remains the more reliable choice at this time.
4 Windows Test Mode
You need to enable Windows test mode for the development of real-time controls with TwinCAT3 C/C++ Those who do not use C/C++ may skip this section.
4.1 Disable Secure Boot
Make the setting of Secure Boot disable in the BIOS menu. Link
4.2 Disable Driver Signature Enforcement
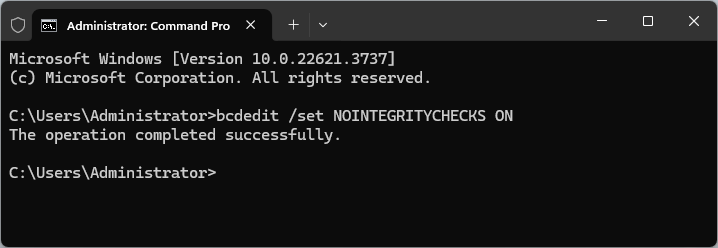
Execute the following command
bcdedit /set NOINTEGRITYCHECKS ONon the administrator command prompt, then reboot your PC.
If you want to make driver signature enforcement able again, execute the following command
bcdedit /set NOINTEGRITYCHECKS OFFon the administrator command prompt, then reboot your PC.
4.3 Enabling Windows Test Mode
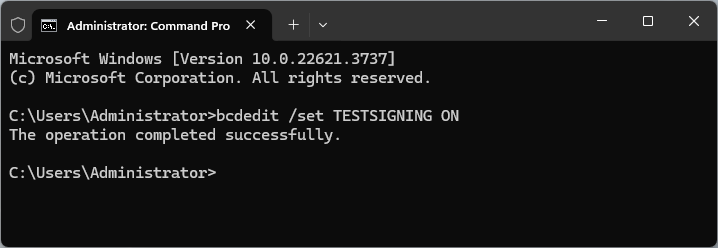
Execute the following command
bcdedit /set TESTSIGNING ONon the administrator command prompt, then reboot your PC.
If you want to finish Windows test mode, execute the following command
bcdedit /set TESTSIGNING OFFon the administrator command prompt, then reboot your PC.
If it is succeeded, you can see the following display on the lower right corner of the display.

5 Stabilization of Real-time Processing
5.1 Isolation of CPU Cores
Open the following window by double-clicking Real-Time in SYSTEM, Solution Explorer.
Click the Set on Target button in order to assign Shared Cores and Isolated Cores. The Shared Cores are Cores to share the functions between TwinCAT and Windows OS. The Isolated Cores are Cores only for TwinCAT.
5.2 Checking CPU Core
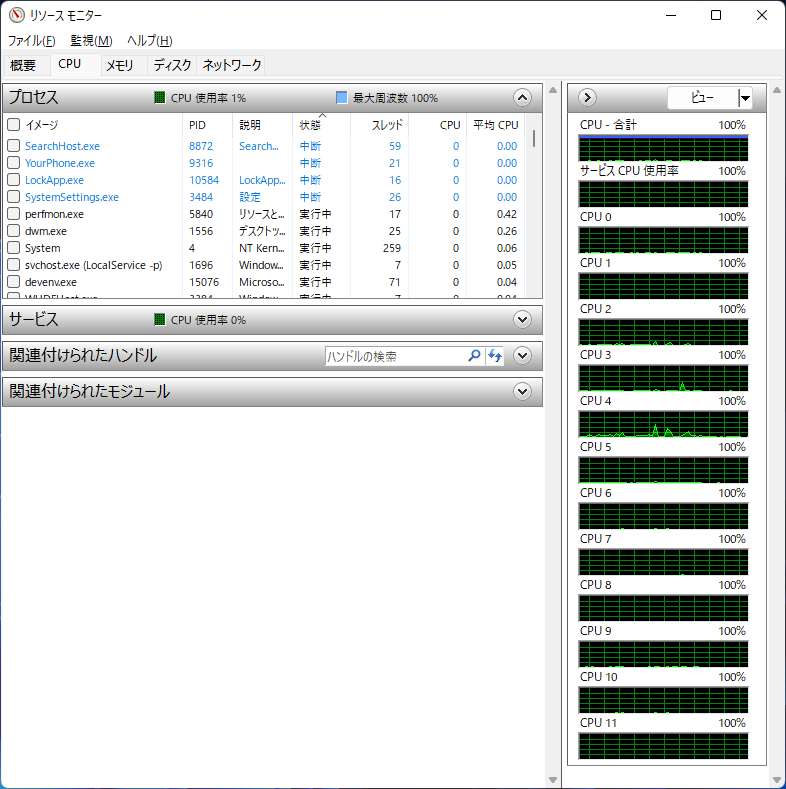
Open “Run” by entering “Win key + R.” Open Resource Monitor by entering the following command.
resmon| Before Core10, 11 Isolated | After Core10, 11 Isolated |
|---|---|
 |
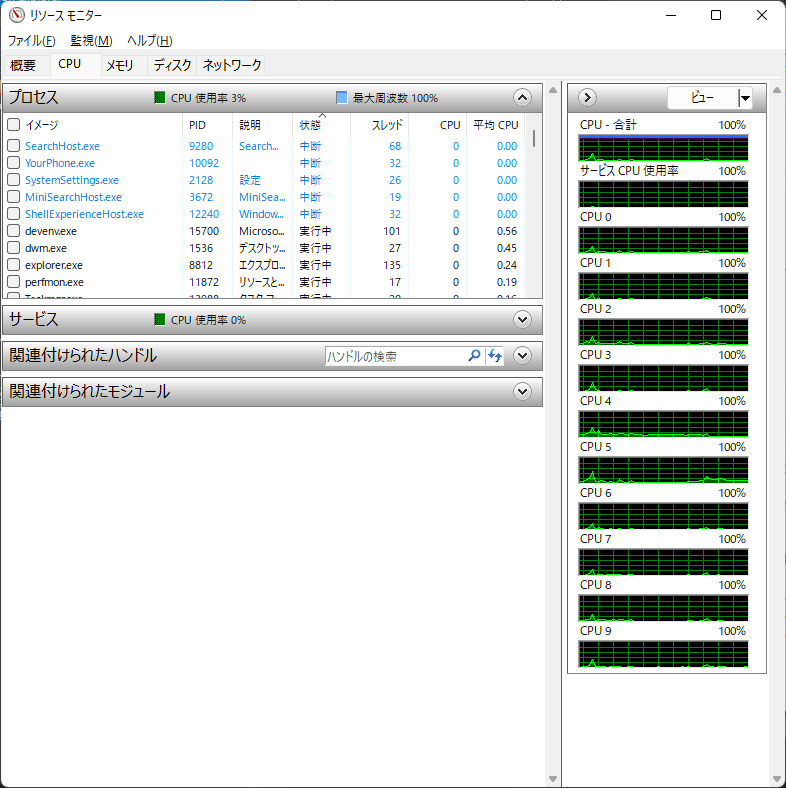 |
You can see the CPU10 and the CPU11 are out of recognization of Windows OS. the real-time processing of TwinCAT will be stable because Windows OS processing does not interrupt TwinCAT.
6 Additional Settings
The following settings are required to switch TwinCAT 3 XAR to Run Mode.
6.1 Enabling Virtualization Technology (VT-x)
Enable Virtualization Technology (VT-x) in the BIOS/UEFI menu.
6.2 Disabling Hyper-V
Go to Control Panel -> Turn Windows features on or off, and uncheck the Hyper-V checkbox.
execute the following command
bcdedit /set hypervisorlaunchtype offon the administrator command prompt, then reboot your PC.
7 Running Performance (Example)
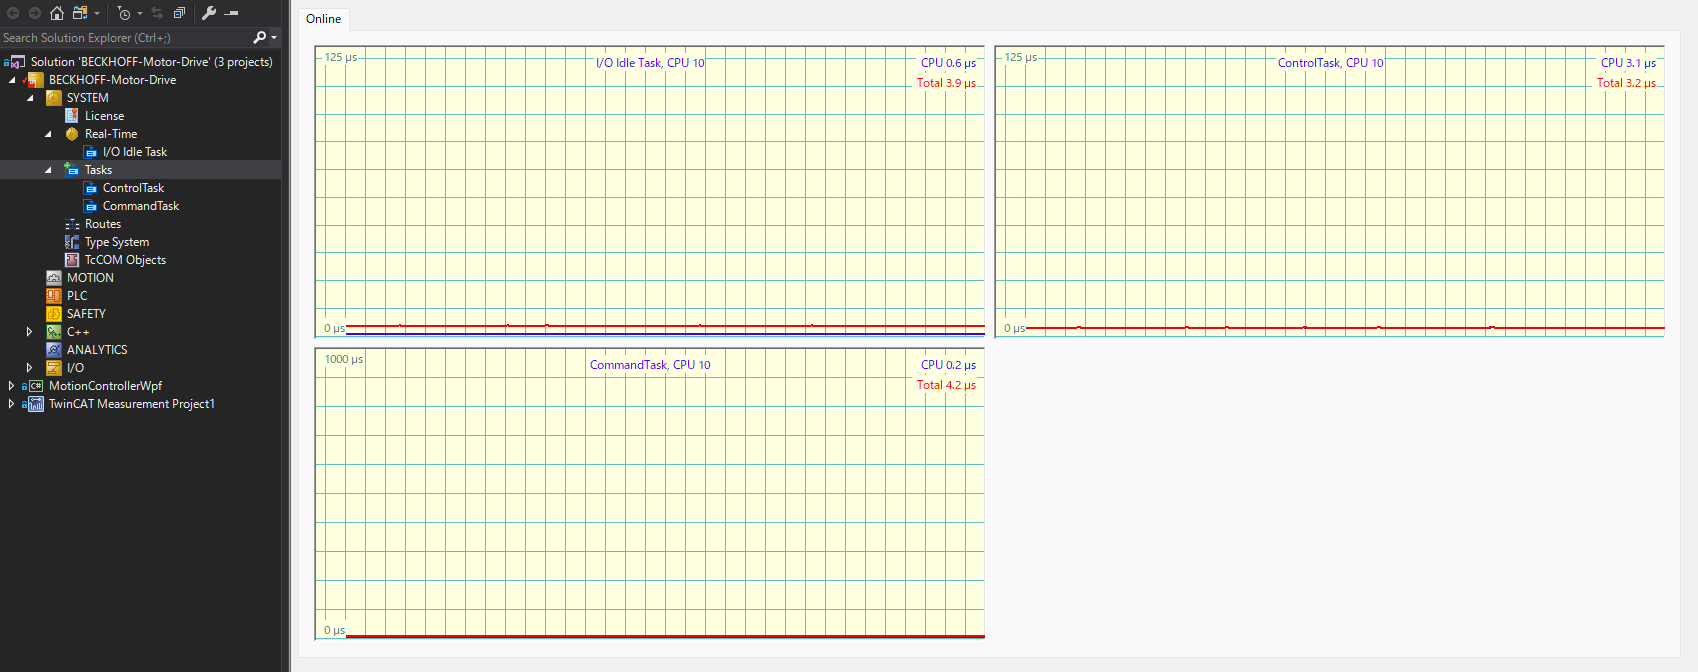
The following video shows two servo motors being driven simultaneously under bilateral control, using a TwinCAT 3 C/C++ project with a cycle time of 125 µs (8 kHz).
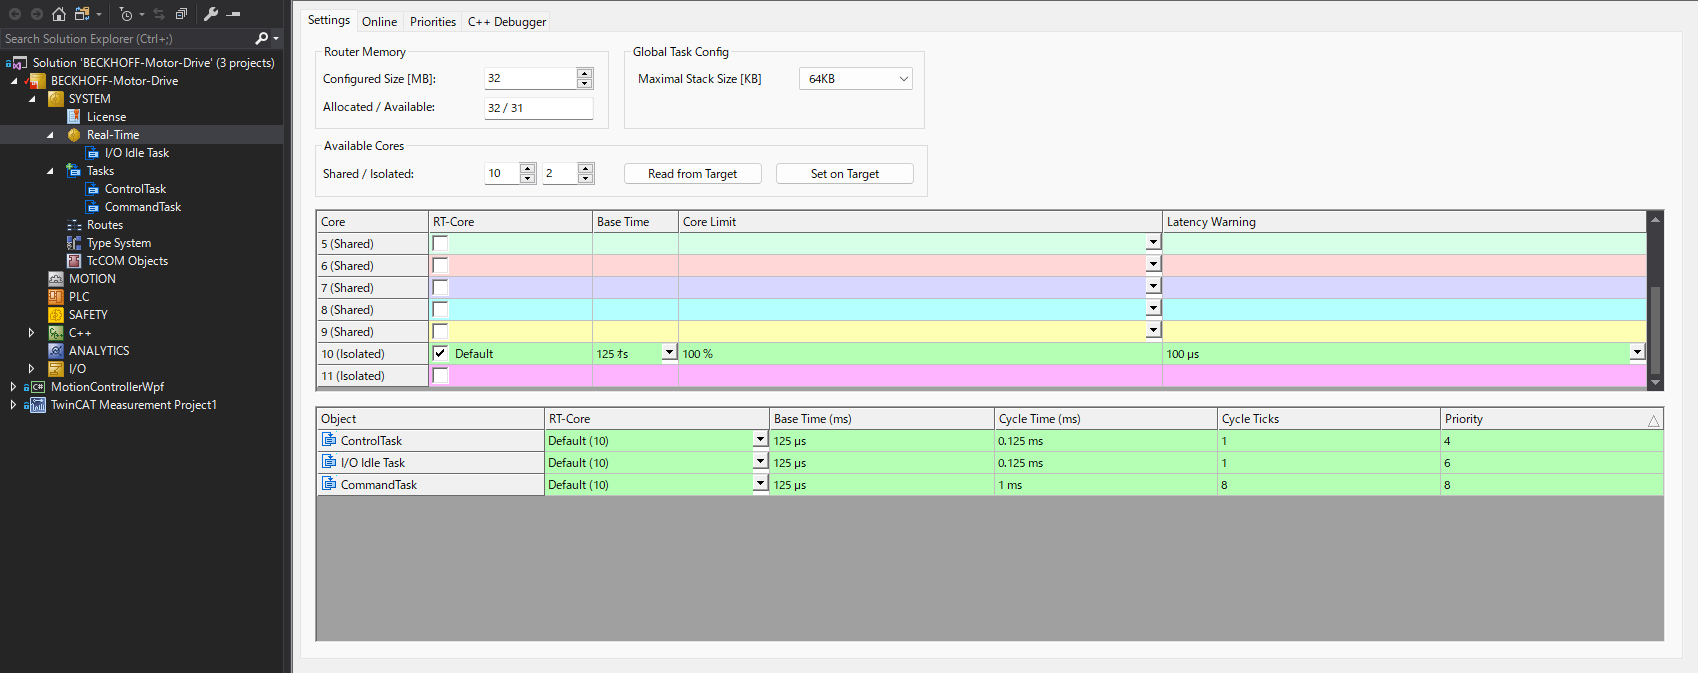
The following figure shows the Task processing when two servo motors are driven simultaneously at Cycle Time 125us (8kHz) with real-time FB control configured in the TwinCAT3 C/C++ Project. You can see the processing very stable.
TwinCAT processing is stable, even if you are watching YouTube!
That’s all. Have a good TwinCAT life.