1. Introduction
TwinCAT3 has a development environment for software development called XAE and an execution environment for real-time processing called XAR.
Then, the development environment PC and the execution environment PC can be separated by preparing a PC with XAE installed and a PC with XAR installed.
This page introduces how to connect from the development enviornment PC to execution environment PC by remote connection.
I prepared a note PC Thinkpad E14 Gen3 for the development environment PC.
Then, the execution environment PC is the mini PC ThinkCentre M75q Tiny Gen2 introduced the previous page.
Specification of the Development Environment PC
- OS: Windows 11 Pro 64bit
- GPU: AMD Ryzen™ 7 5700U
- Memory: 8+8 GB DDR4-3200MHz
- 1st Storage: 256 GB SSD, M.2 PCIe-NVMe
- 2nd Storage: 1 TB SSD, M.2 PCIe-NVMe
Here, a 8 GB storage and the 2nd Storage have been added to empty slots respectively after purchase.
2. Installation of TwinCAT3
TwinCAT3 full setup installer is HERE.
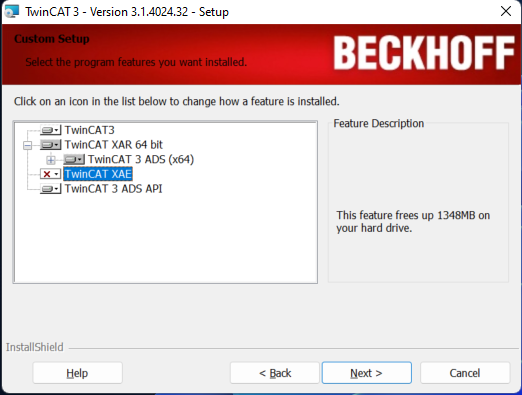
2.1. Installation of XAR to the execution environment PC
- Execute TwinCAT3 full setup installer.
- Choose "Custom" setup type.
- Click "TwinCAT XAE", choose "This fearure will not be available."
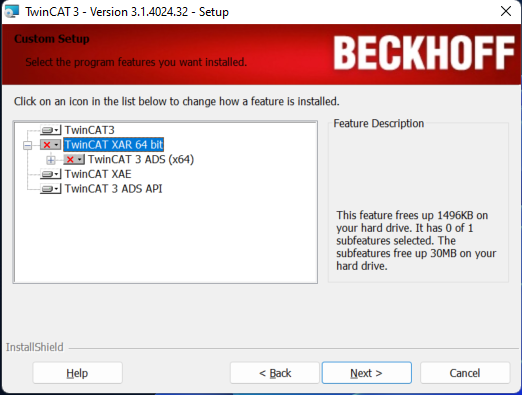
2.2. Installation of XAE to the development environment PC
- Execute TwinCAT3 full setup installer.
- Choose "Custom" setup type.
- Click "TwinCAT XAR 64 bit", choose "This fearure will not be available."
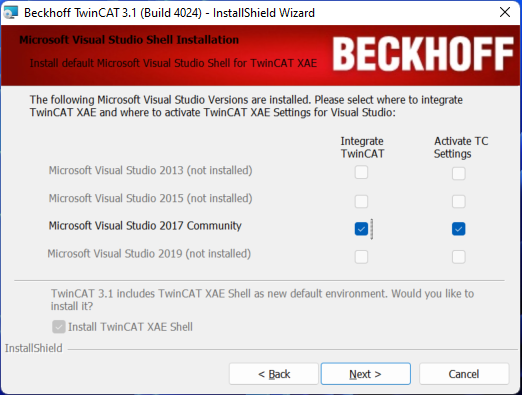
- Check the installed Visual Studio.
- Do not forget checking "Install TwinCAT XAE Shell" either, otherwise TwinCAT measurement will not be installed.
3. IP Adress Setting
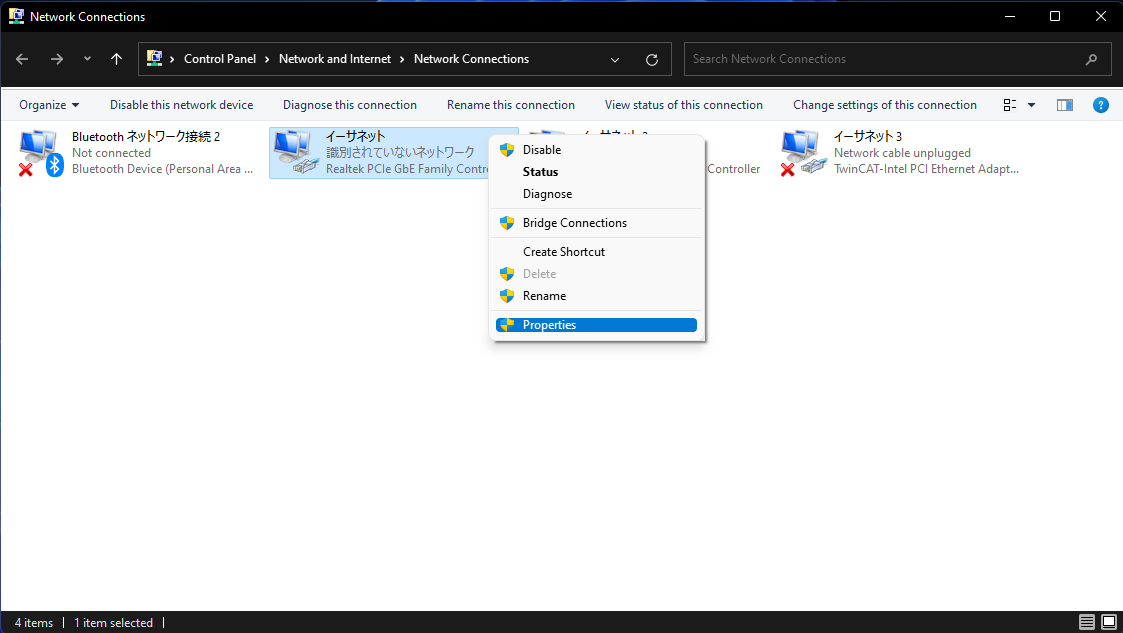
Open "Network Connections", then set appropriate IP addresses on each PC.
How to Open Network Connections
- Open Settings from Windows Start.
- Click "Network & internet."
- Click "Advanced network settings."
- Click "More network adapter options."
3.1. Execution Environment PC Side Setting
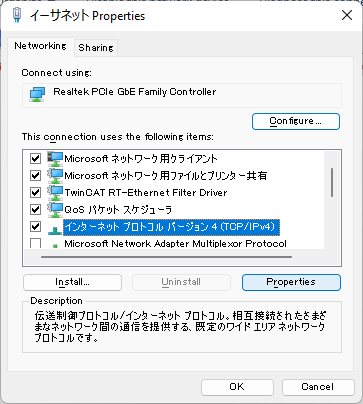
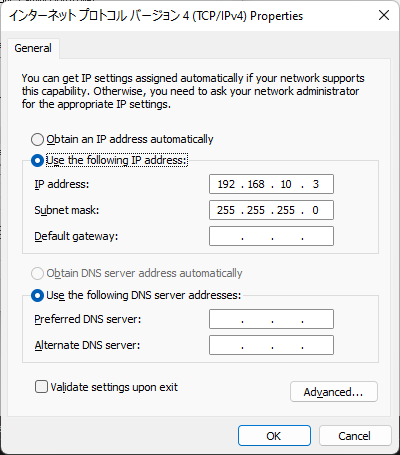
Open TCP/IPv4 properties of Ethernet to connect to the development environment PC, then set the following IP address and subnet mask.
- IP adress: 192.168.10.3
- Subnet mask: 255.255.255.0
3.2. Development Environment PC Side Setting
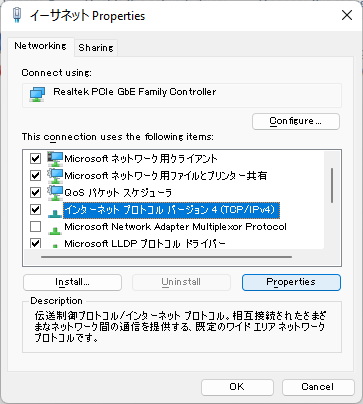
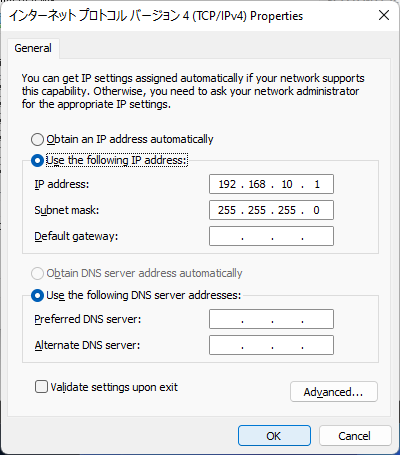
Open TCP/IPv4 properties of Ethernet to connect to the execution environment PC, then set the following IP address and subnet mask.
- IP adress: 192.168.10.1
- Subnet mask: 255.255.255.0
4. AMS Net ID Setting
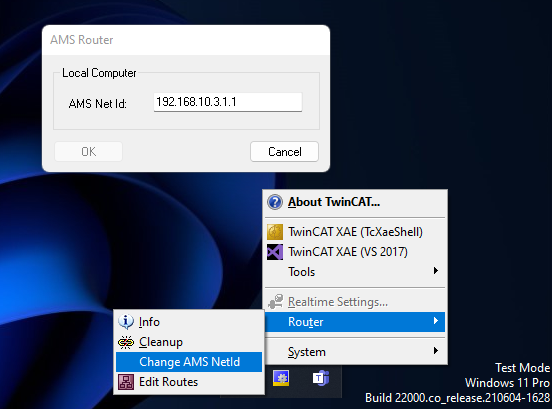
In the execution environment PC, set the following AMS Net Id.
Here, check and set a different AMS Net Id to the development environment PC.
5. Specific Ports Opening
Open Windows Defender Firewall with Advanced Security.
Windows Security -> Firewall & network protection -> Advanced setting
Set the following Inbound Rules and Out Bound Rules in the both PCs.
| Protocol | Port No. | Direction | Usage |
|---|---|---|---|
| TCP | 48898 | Inbound & Outbount | Communication |
| UDP | 48899 | Inbound & Outbount | Broadcast search |
| TCP | 8016 | Inbound & Outbount | Secure ADS |


6. Remote System Connection
- Select and click "Choose Target System" in the tab.

- Click "Search (Ethernet)."

- Check "Advanced Setting."
- Check "IP Address."
- Click "Broadcast Search."

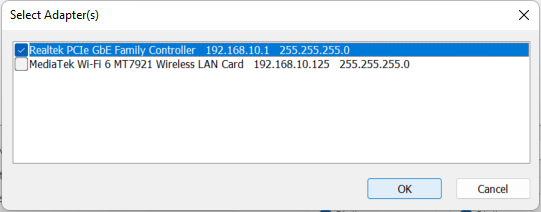
- Select an adapter to connect to the execution environment PC, and push "OK."
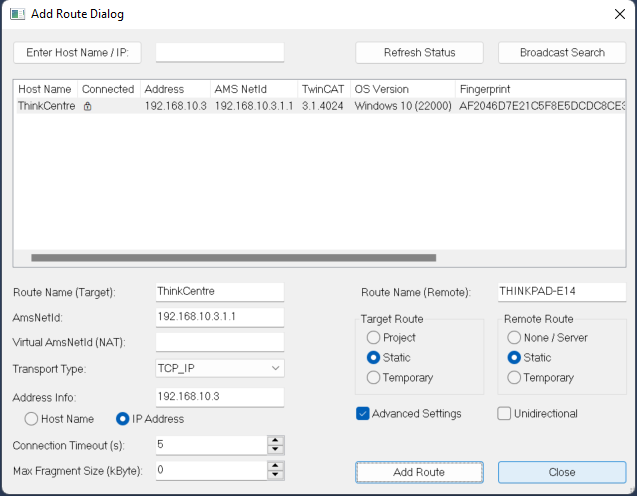
- Click Add Route.
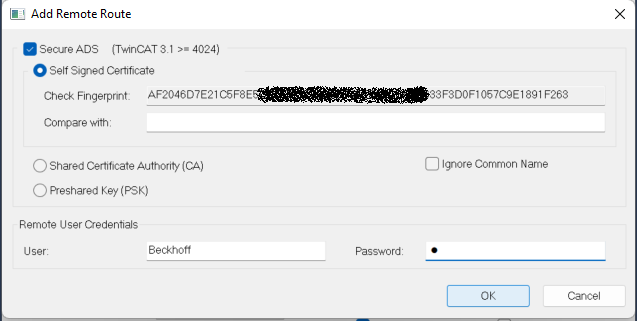
- Check "Secure ADS", write an administrator local account info. of the execution environment PC, then push "OK."
- See the execution environment PC's name in "Host Name" and the key icon in "Connected."
- Close the popup window.
- The following figure shows a successful statement of the remote system connection.
